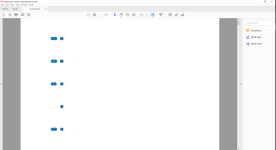
When you work with big data some of the report pdf files can be not readable due to data amount and installation of data takes ages as below:

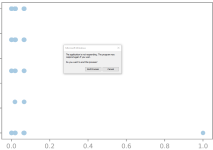
And may be pdf file can be frozen:

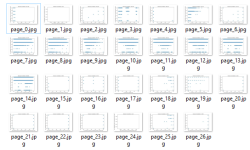
Then you need to convert pdf pages to jpg images quickly as below:

This article will guide you on how to convert PDF pages to JPG images using Python. In this tutorial, we will be using the `PyMuPDF` (also known as `fitz`), `PIL` and `os` libraries. We will not be using the `pdf2image` library.
Installation
First, let's make sure that we have all the required libraries installed. If not, we can install them using pip:
Reading the PDF File
To read the PDF file, we use the `fitz.open()` method, which returns a `Document` object that represents the PDF document.
Converting PDF Pages to Images
Next, we will convert each page of the PDF to an image. The `Document` object is iterable and each element in it represents a page in the PDF. To get an image of a page, we call the `get_pixmap()` method on a `Page` object, which returns a `Pixmap` object. The `Pixmap` object has a `samples` attribute that contains the pixel data for the image. We use the `Image.frombytes()` method from PIL to create an image from this pixel data.
Saving the Images
Finally, we save each image to a JPG file. The `Image.save()` method is used for this. The filename for each image is generated by appending the page number to a base filename.
We use `os.path.join()` to create the file path for the image file. This ensures that the path is correct, regardless of the operating system.
Full Code
Here's the complete Python code that brings all of the above together:
Remember to replace `'path_to_your_pdf.pdf'` and `'path_to_output_folder'` with the paths to your PDF file and the output folder, respectively.
In conclusion, we've learned how to convert PDF pages to JPG images using Python, PyMuPDF and PIL. This can be handy in many situations, including machine learning tasks that involve image processing, making thumbnails of PDF pages, and more.
And may be pdf file can be frozen:
Then you need to convert pdf pages to jpg images quickly as below:
This article will guide you on how to convert PDF pages to JPG images using Python. In this tutorial, we will be using the `PyMuPDF` (also known as `fitz`), `PIL` and `os` libraries. We will not be using the `pdf2image` library.
Installation
First, let's make sure that we have all the required libraries installed. If not, we can install them using pip:
Code:
pip install PyMuPDF pillowReading the PDF File
To read the PDF file, we use the `fitz.open()` method, which returns a `Document` object that represents the PDF document.
Code:
import fitz

doc = fitz.open('path_to_your_pdf.pdf')
Converting PDF Pages to Images
Next, we will convert each page of the PDF to an image. The `Document` object is iterable and each element in it represents a page in the PDF. To get an image of a page, we call the `get_pixmap()` method on a `Page` object, which returns a `Pixmap` object. The `Pixmap` object has a `samples` attribute that contains the pixel data for the image. We use the `Image.frombytes()` method from PIL to create an image from this pixel data.
Code:
from PIL import Image

for i in range(len(doc)):
    page = doc.load_page(i)
    pix = page.get_pixmap()
    img = Image.frombytes("RGB", [pix.width, pix.height], pix.samples)
Saving the Images
Finally, we save each image to a JPG file. The `Image.save()` method is used for this. The filename for each image is generated by appending the page number to a base filename.
Code:
import os

output_folder = 'path_to_output_folder'

for i in range(len(doc)):
    page = doc.load_page(i)
    pix = page.get_pixmap()
    img = Image.frombytes("RGB", [pix.width, pix.height], pix.samples)
    img.save(os.path.join(output_folder, f'page_{i}.jpg'))
We use `os.path.join()` to create the file path for the image file. This ensures that the path is correct, regardless of the operating system.
Full Code
Here's the complete Python code that brings all of the above together:
Code:
import fitz
import io
import os
from PIL import Image

def pdf_to_jpg(pdf_path, output_folder):
    # Check if output_folder exists, if not, create it
    if not os.path.exists(output_folder):
        os.makedirs(output_folder)

    doc = fitz.open(pdf_path)
    for i in range(len(doc)):
        page = doc.load_page(i)  # load page i of the PDF
        pix = page.get_pixmap()  # render page to an image
        img = Image.frombytes("RGB", [pix.width, pix.height], pix.samples)  # convert to PIL image object
        img.save(os.path.join(output_folder, f'page_{i}.jpg'))  # save image to the output folder

pdf_to_jpg('all_plots.pdf', 'images')
Remember to replace `'path_to_your_pdf.pdf'` and `'path_to_output_folder'` with the paths to your PDF file and the output folder, respectively.
In conclusion, we've learned how to convert PDF pages to JPG images using Python, PyMuPDF and PIL. This can be handy in many situations, including machine learning tasks that involve image processing, making thumbnails of PDF pages, and more.
Attachments
Last edited: