I have been trying to install Elasticsearch for Xenforo for a while. I was getting some problems which is not clear for me. Finally, I achieved to install and run elasticsearch and want to share the steps with you:
First connect your server as:
root and update your system:
Update your structure and packages with codes below:
Remove previous installation with code below:
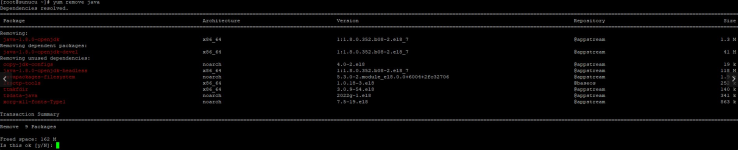
Remove previous Java installation

Type y and press enter.
Then you are ready to make fresh installation.
Go to home if you are not with:
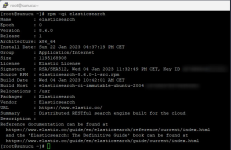
Install elastic search:
install nano if you do not have nano and accept:
Then set Java_Home settings:
First oppen the file with:
Then add the codes to file with right click of mause:
Then press Ctrl + X on windows and press y + Enter
Output will be like:

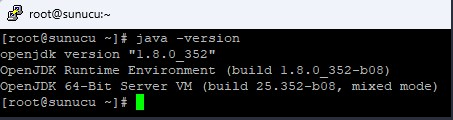
Check your java version with code:

Source the created file with code:
First connect your server as:
Code:
yum update -yroot and update your system:
Update your structure and packages with codes below:
Code:
sudo dnf update -y
sudo dnf clean all
Remove previous installation with code below:
Code:
yum remove elasticsearchRemove previous Java installation
Code:
yum remove javaType y and press enter.
Then you are ready to make fresh installation.
Go to home if you are not with:
Code:
cdInstall elastic search:
Code:
sudo yum -y install java-1.8.0-openjdk java-1.8.0-openjdk-develinstall nano if you do not have nano and accept:
Code:
yum install nanoThen set Java_Home settings:
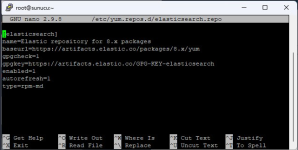
First oppen the file with:
Code:
nano /etc/profile.d/java8.shThen add the codes to file with right click of mause:
Code:
export JAVA_HOME=/usr/lib/jvm/jre-openjdk
export PATH=\$PATH:\$JAVA_HOME/bin
export CLASSPATH=.:\$JAVA_HOME/jre/lib:\$JAVA_HOME/lib:\$JAVA_HOME/lib/tools.jar
Then press Ctrl + X on windows and press y + Enter
Output will be like:
Check your java version with code:
Code:
java -versionSource the created file with code:
Code:
source /etc/profile.d/java8.sh